

Also, as I've said before I'm just learning to sew and I am by no means an expert. I'm calling this a semi-tutorial because I really don't think this alone is enough to help you hem a skirt. The internet is full of all kinds of tutorials so seek more information! I'll provide some links that were helpful to me later in this post. My purpose with this kind of thing is more about chronicling my projects and experiences while learning to sew. A "sewing diary" perhaps. With that said, if you're an expert sewer reading this and thinking to yourself "she should have done this instead of that" or "wow, she's totally wrong about that" please, let me know! This is only my second sewing project and I want to learn everything I can. I definitely want to learn from my mistakes or learn about other methods that may have been easier. And I certainly don't want to pass bad instructions on to my readers.
Ok, so this skirt was just plain weird. It had a zipper on the bottom...making hemming pretty much impossible. So my first step was to remove that.

If you ever face a weird skirt such as mine and wish to hem it, here's how you go about zipper removal. Not too difficult, as long as you have a seam ripper.

That's a view of the zipper inside out. On my skirt there were a few stitches at the top of the zipper, so I started by taking out those.

Next I folded the zipper over to reveal the seam between the zipper and the fabric. It's kind of hard to rip that seam, mostly because it's hard to see.


(Excuse my typo in that photo, it should say "in" not "it")
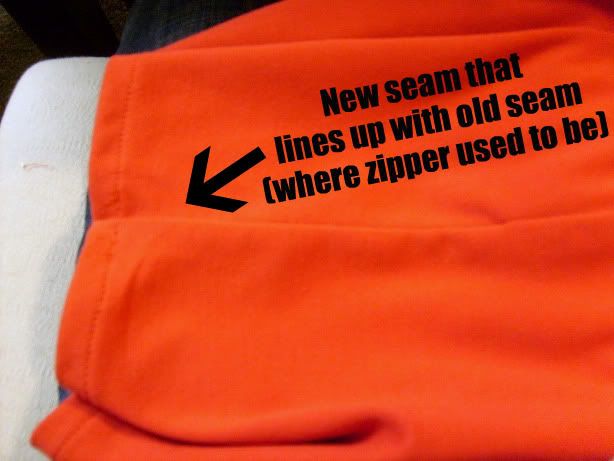
At this point you'll have a slit at the bottom of the skirt where the fabric used to be. You can choose to re-install the zipper later but I didn't because it seemed pretty pointless. If you wanted to do that there's a good tutorial on zippers here. According to that tutorial you'd need to sew up this slit before reapplying the zipper anyways, so this next part will still be relevant to you. As I said I didn't see the need for the zipper so I just sewed up the slit like so...

You'll need a couple pins to keep the two pieces of the slit together. It's kind of hard to see in this photo, but there should be a visible fold in the fabric where the zipper used to be that lines up with the seam that's already there. This will be very helpful and allow you to easily line up your new seam with the seam that was above the zipper.
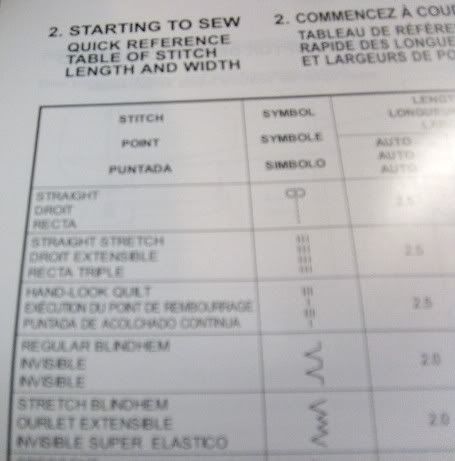

A note on sewing with stretch fabrics - this was my first time sewing a stretch fabric, so I'm very inexperienced with them - but check your sewing machine manual to see what settings you should use when sewing with stretch. As you can see in the photo above, I used the second setting "Straight Stretch." I was very nervous about sewing stretch fabric, but I encountered only a few problems, none of which were a big deal. So, don't be afraid of stretch! For those of you who are experienced stretch-fabric-sewers, I have a question. Why would my machine only sew one back-stitch? I never encountered this problem when sewing a basic straight stitch on non-stretch fabric.
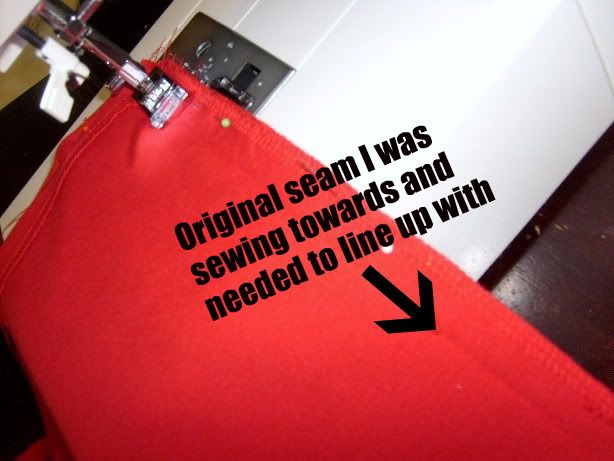

Back to the skirt, I had to line my needle up with the fold where the zipper used to be and sew until I reached the seam that was already there.

Yay, a zipper-free skirt!


But too long! The standard thing to do is pin the skirt while wearing it so you can see what length you want it to be. I tried that and it seemed kind of tricky. I was trying to fold the fabric up and in while pinning...maybe there's a better way to go about it? Anyways, I gave up on that method because my black skirt from UO is an almost identical fit. So, I used it as a guide for the length I wanted.


I pinned my skirt a teeny bit longer because it sits a little higher on my waist than the black skirt does.
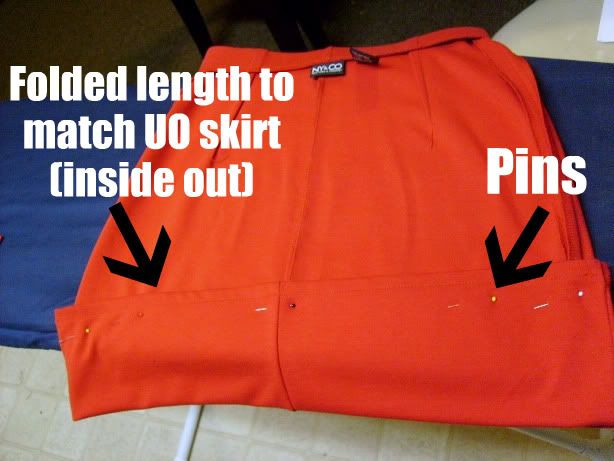

Of course, you want to do your pinning and folding inside-out.
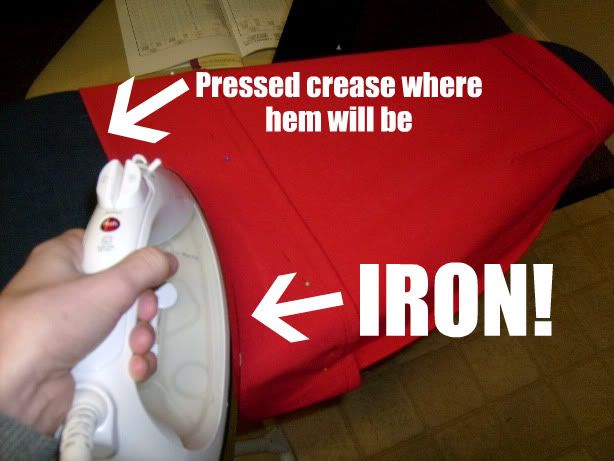

Once you've decided where you want the new hem to be it's good to press along the fold to make it easier to sew. (Make sure your fabric can handle a hot iron!)
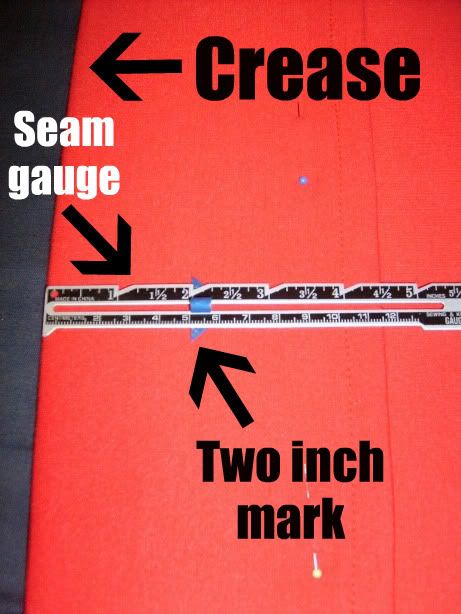
Here's where my plan went awry. I was planning on doing a blind hem as show in this video. This requires you to make a very small fold in the fabric, about 1/4 inch, and press it. A blind hem stitch will sew a few straight stitches along this fold and then a zig-zag stitch above the fold, making your hem almost invisible. (It's really hard for me to explain without visuals...so check out the video if you're interested.) But, that just wouldn't work with this fabric. It was impossible for me to make such a small fold because this fabric doesn't crease well when ironed. If you do watch the video and decide to do the blind hem refer to your sewing manual again because this will require a different presser foot and a few adjustments on your machine. If you're sewing a stretch like this skirt there's a separate setting for doing a blind hem with stretch fabric (you can see it in the photo of my manual above). Anyways, the next couple steps in this tutorial were done because I thought I was going to do the blind hem - and the video tutorial said to trim the fold down to two inches.
Here's where my plan went awry. I was planning on doing a blind hem as show in this video. This requires you to make a very small fold in the fabric, about 1/4 inch, and press it. A blind hem stitch will sew a few straight stitches along this fold and then a zig-zag stitch above the fold, making your hem almost invisible. (It's really hard for me to explain without visuals...so check out the video if you're interested.) But, that just wouldn't work with this fabric. It was impossible for me to make such a small fold because this fabric doesn't crease well when ironed. If you do watch the video and decide to do the blind hem refer to your sewing manual again because this will require a different presser foot and a few adjustments on your machine. If you're sewing a stretch like this skirt there's a separate setting for doing a blind hem with stretch fabric (you can see it in the photo of my manual above). Anyways, the next couple steps in this tutorial were done because I thought I was going to do the blind hem - and the video tutorial said to trim the fold down to two inches.

A seam gauge is great for measurements like these. It has a slider that you can use to do the same measurement over and over...much easier than a tape measure.
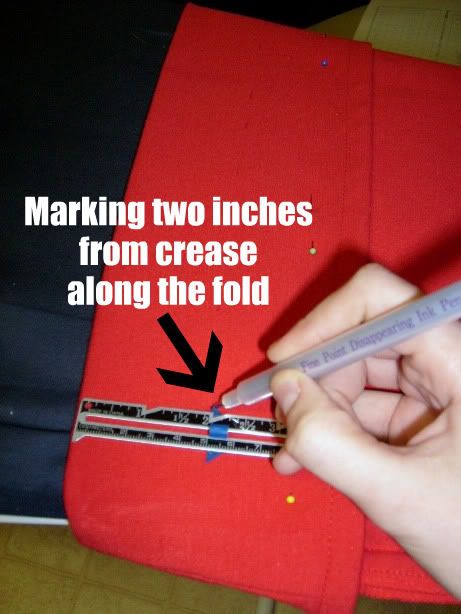

I marked this measurement even though it's not really necessary since it will be on the inside of the skirt...
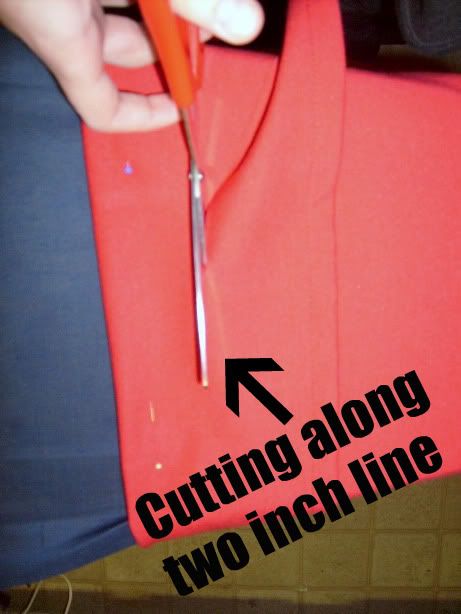

And then I trimmed the extra fabric...attempted to press a 1/4 inch fold to do the blind seam and realized I couldn't so...
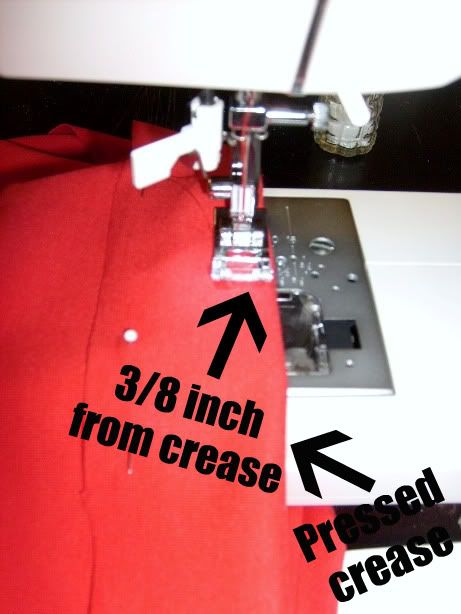

I decided to just sewing a straight stitch 3/8 inch from the fold. It might not look as good as the blind hem would have, but it's how the original hem was sewn, so I think it looks fine.
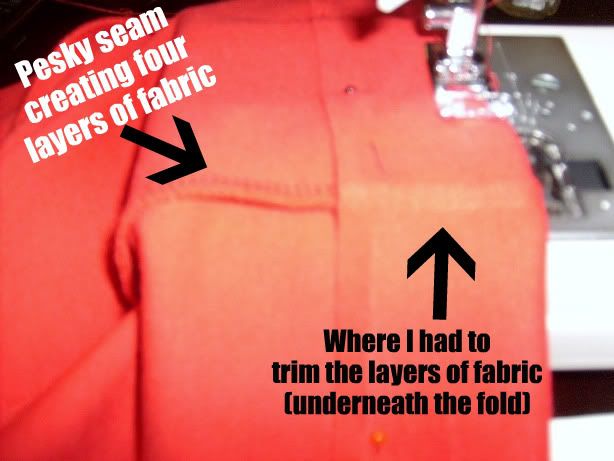

Once I got to the side seams my machine kind of...stopped. Well, it just kept sewing in the same spot instead of going over the side seams, creating a big mess. So I had to trim the edges of the fabric on the side seams so that I wasn't trying to sew through four layers. Does that makes sense? Also, once I was done I ended up trimming the rest of the fabric on the inside of the skirt (that 2 inches I cut earlier) about 1/4 inch from the new hem.
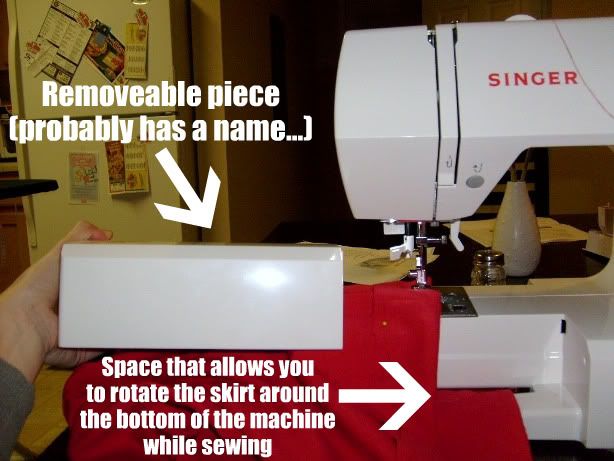

The first time I used my sewing machine I discovered that this piece was removable but I couldn't really figure out why. While hemming this skirt I discovered it's purpose! It allows you to slide the fabric under the machine, which makes sewing things like skirts (that don't have an end) much easier.


Ta da! A much better length. If you found this semi-tutorial to be absolutely useless (which wouldn't surprise me) or even if you didn't, check out this video series for really helpful guides to mending and hemming.
And as I said before, if you have any advice on better sewing techniques, let me know! Check back soon for an outfit post featuring my newly-hemmed skirt!
And as I said before, if you have any advice on better sewing techniques, let me know! Check back soon for an outfit post featuring my newly-hemmed skirt!


6 comments:
this information could not have come at a better time, you must have beebn reading my mine! I just wrote about a great vintage dress I found recently that needs a lot of help!
Your a doll and this is a huge huge help!
by the way: this put a huge smile on my face and made my day!
great idea! I just found a vintage skirt in my grandma's closet...but it's excessively long! Thanks for the tutorial!! ;)
you rock. i wanna learn how to do this.
you rock. i wanna learn how to do this.
this is such a neat tutorial! And p.s. I looove your hair, it's pixie bob perfection!
Post a Comment